Before jumping into the deployment process you have to prepare something such as
- Redis
- MongoDB
- Frontend URL
1/ Deploy backend using Render button
Render button will help you to deploy Namviek as quickly as possible.
Click on it to redirect to Render deployment page. Now input your blueprint name and jump to next step

2/ Input environment variables

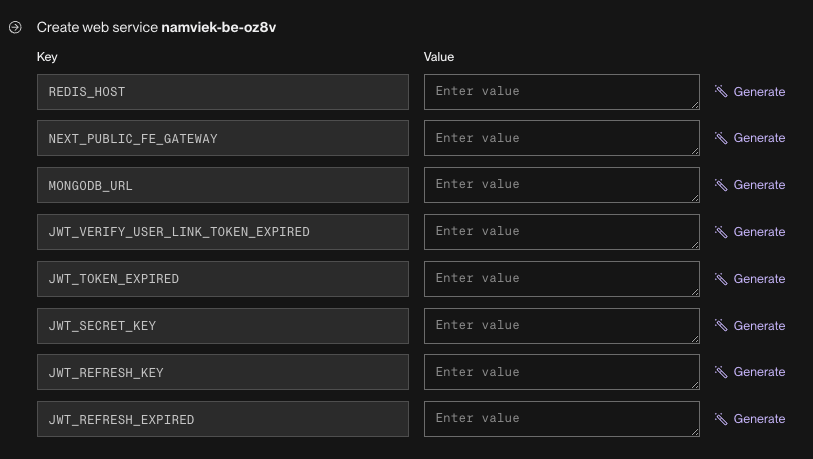
As you can see above image. This step requires 8 environment variables. However there are three of them are most important is that REDIS_HOST, NEXT_PUBLIC_FE_GATEWAY and MONGODB_URL.
Visit this article to get REDIS_HOST value and this for MONGODB_URL. Regarding NEXT_PUBLIC_FE_GATEWAY you have to setup your own frontend application. Head over to this for deploying frontend on Vercel.
For the last 5 variables you can see the following guide to fill them
| Variables | Value | Desc |
|---|---|---|
| JWT_VERIFY_USER_LINK_TOKEN_EXPIRED | 10m | |
| JWT_TOKEN_EXPIRED | 2d | Ex: 1h, 1d, 20m |
| JWT_REFRESH_EXPIRED | 4d | |
| JWT_SECRET_KEY | Iw98erhsd | Anything you want |
| JWT_REFRESH_KEY | 09123skjdhfwe |
Then press Deploy Blueprint to start the deployment process
3/ Result
Finally, head over to Render Dashboard, there you can see your sevice that you just deploy a few seconds ago. Click on it to find your backend URL after the deployment process finished

Save the url for using later (Ex: Deploy frontend process need this URL)
